
There’s nothing quite like the sound of a chicken thigh hitting a hot pan, but lately, I’ve found a better sound: the quiet hum of my air fryer signaling a perfect, golden finish. Spring cooking calls for lighter meals without sacrificing that comforting crunch, and that’s exactly where these air fryer spring chicken thighs come in. After testing various timing and seasoning methods in my own kitchen, I’ve landed on a technique that ensures these thighs come out incredibly crispy on the outside while remaining juicy and tender on the inside. This isn’t about complex techniques or hours at the stove; it’s about maximizing flavor with minimal effort, making it the ideal weeknight solution.
Ingredients & Equipment
To make this work, you need the right balance of fat, acid, and salt. I rely on a high-quality extra-virgin olive oil to help the skin crisp up without burning. Fresh lemon provides the brightness that defines a spring recipe, cutting through the richness of the meat. For the herbs, dried oregano is my go-to because it clings better to the meat than fresh varieties during the air frying process. You’ll also need kosher salt and freshly cracked black pepper.
The equipment list is short, keeping with the spirit of this recipe. Obviously, you need an air fryer—mine is a 5-quart basket style, which gives the chicken enough room to breathe. If the basket is too crowded, the air can’t circulate, and you’ll end up with steamed chicken rather than crispy chicken. A good meat thermometer is non-negotiable for me; I no longer guess doneness, especially with poultry. Finally, a simple mixing bowl and tongs are all you need to prep.
Prep & Cook Time
I designed this recipe to fit into a busy schedule. You are looking at about 5 minutes of active prep time. The cooking time is roughly 15 to 18 minutes, depending on the thickness of your specific chicken thighs. In total, you’ll have dinner on the table in under 25 minutes.
This speed is what makes the air fryer so effective for weeknight meals. Unlike oven roasting, which requires preheating and longer cook times, the air fryer gets up to temperature quickly. The result is a dish that feels indulgent but comes together in the same time it takes to boil pasta. Making these air fryer spring chicken thighs is honestly one of the quickest ways to get a protein-heavy dinner on the table.
Step-by-Step Instructions
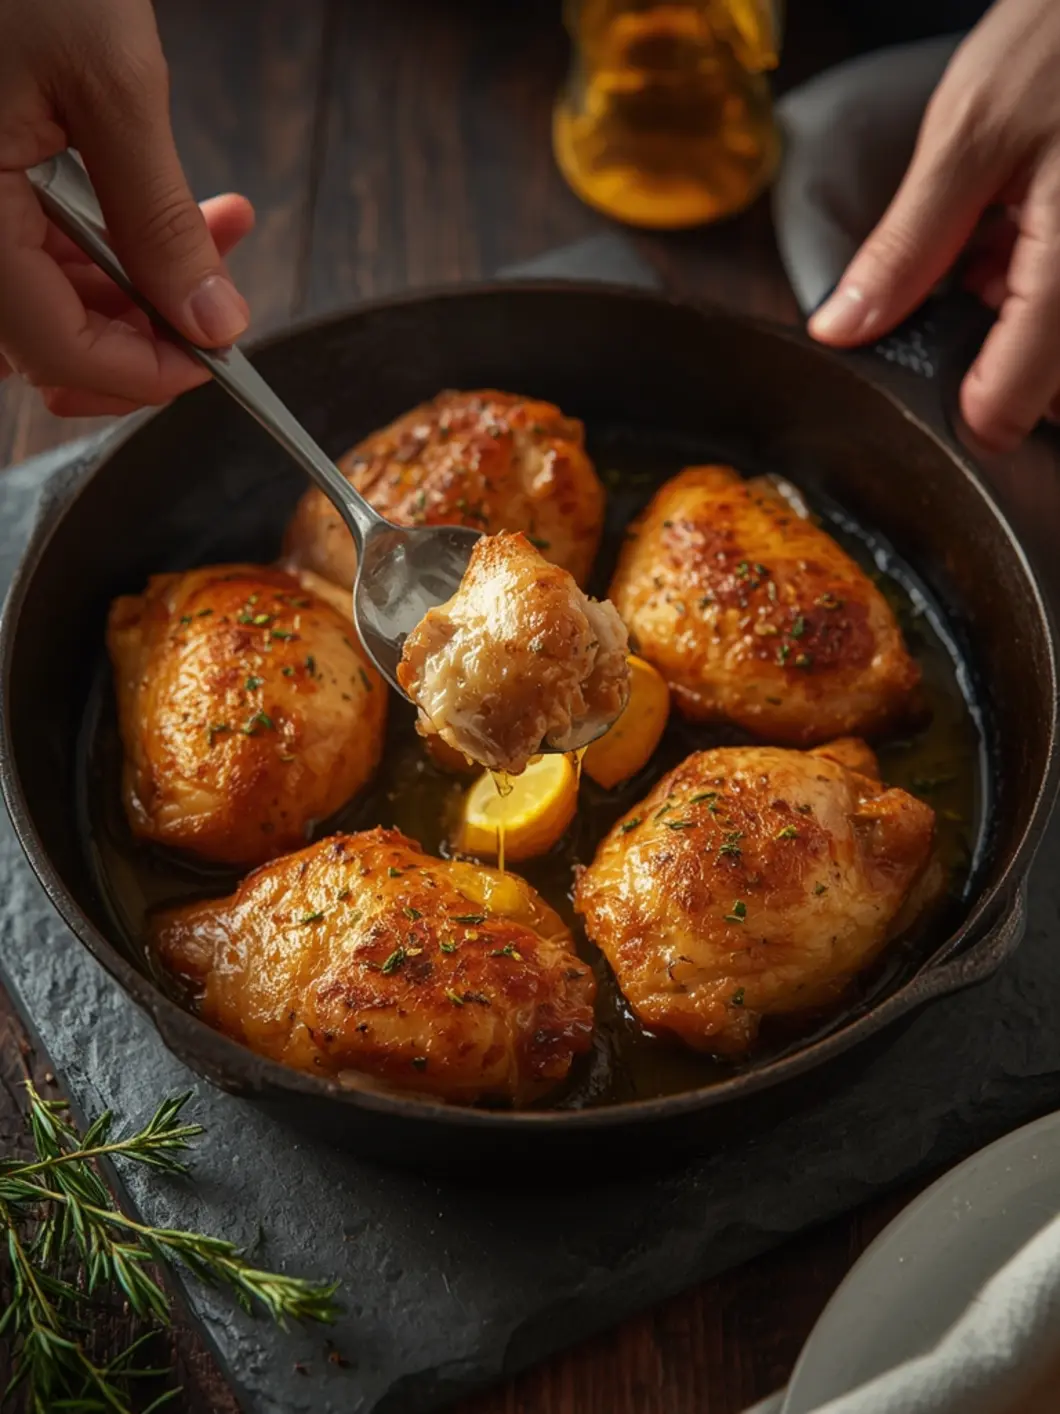
First, pat your chicken thighs very dry with paper towels. This is the most critical step for achieving crispy skin; moisture is the enemy of browning. In a mixing bowl, combine the olive oil, lemon juice, oregano, salt, and pepper. Toss the thighs in this mixture, ensuring every nook and cranny is coated. You can let them marinate for 15 minutes if you have time, but they are ready to cook immediately.
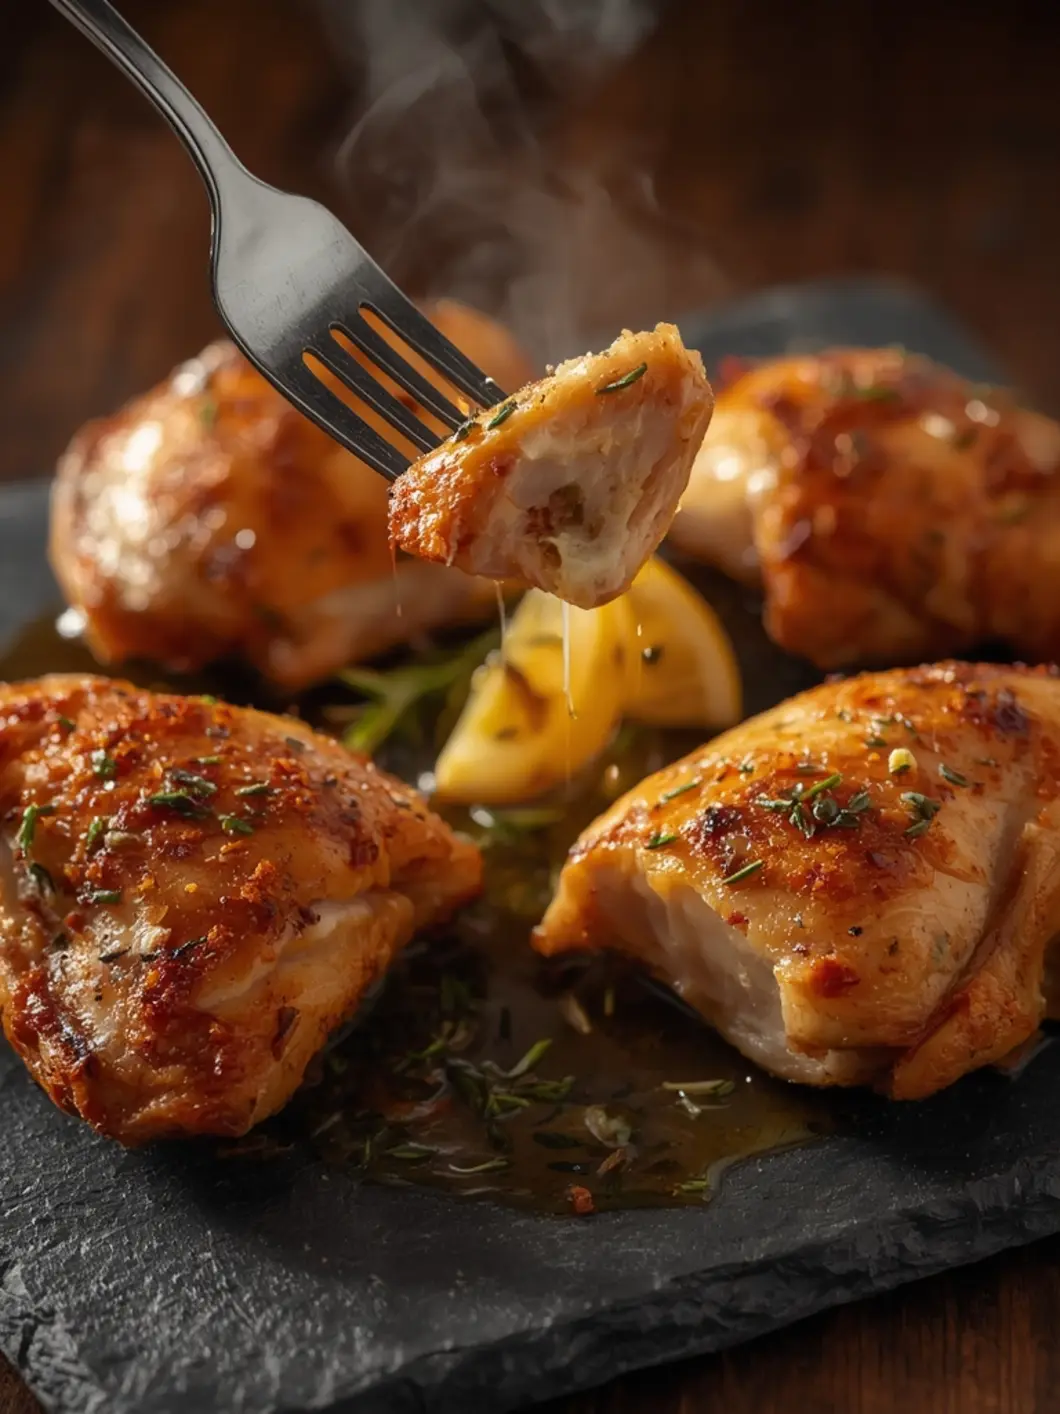
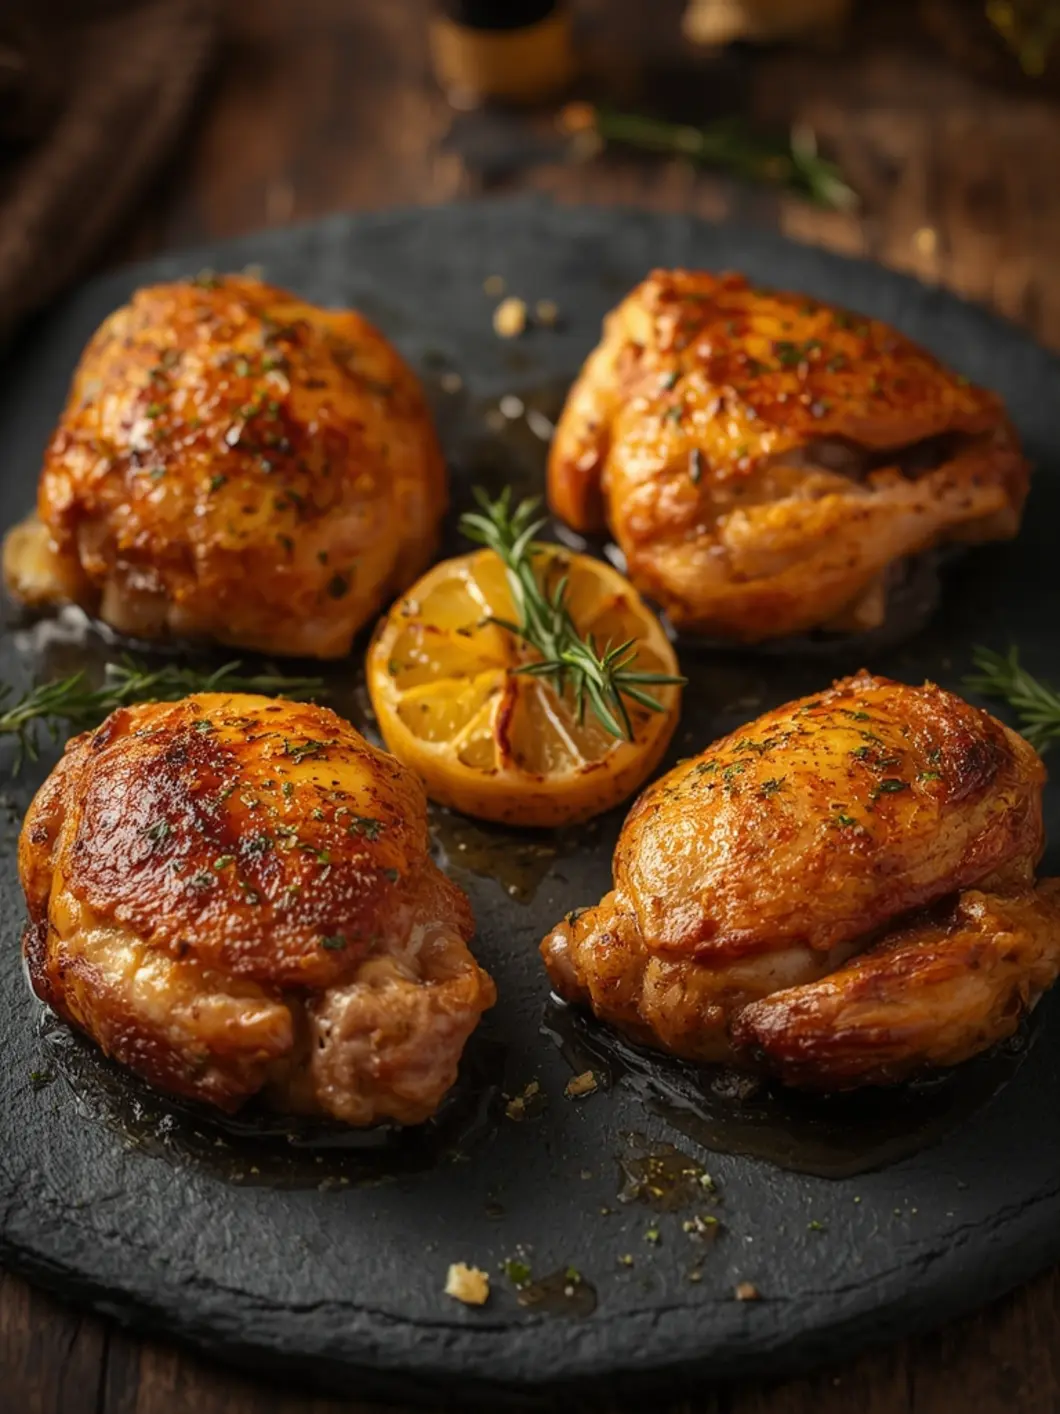
Preheat your air fryer to 400°F (200°C) for about 3 minutes. Arrange the thighs in a single layer in the basket, skin-side down. Do not overcrowd them. Cook for 10 minutes skin-side down to render the fat. Then, flip them over and cook for another 5 to 8 minutes until the internal temperature reaches 165°F (74°C). For the crispiest finish, let the air fryer spring chicken thighs rest for 3 minutes before serving.
Why You’ll Love This Recipe / Health Benefits

I love this recipe because it strikes that perfect balance between health and indulgence. The air fryer allows the fat from the chicken skin to render out significantly more than pan-frying, meaning you get a lighter final dish without losing that satisfying crunch. It’s a high-protein meal that supports muscle maintenance and keeps you full longer, making it excellent for those watching their macros.
When you compare this to traditional fried chicken, the difference in grease is night and day. Using air fryer chicken thighs significantly reduces the calorie load while preserving the texture. This recipe is a prime example of how you can enjoy comfort food during the week without derailing your nutrition goals. It’s a way to prepare chicken that highlights the natural flavor of the meat rather than masking it with heavy breading.
Variations, Substitutions, or Serving Suggestions
If you want to switch up the flavor profile, I highly recommend swapping the lemon for a tablespoon of balsamic vinegar and adding a pinch of smoked paprika. This leans toward an Italian-style roasted chicken that pairs beautifully with roasted vegetables. For those who prefer boneless options, you can use this same marinade on boneless, skinless thighs, but reduce the cooking time by about 3 to 4 minutes to prevent them from drying out.
Serving these thighs is where you can really make the meal shine. I love pairing them with a fresh arugula salad tossed in a light vinaigrette or a side of lemon-herb couscous to soak up the juices. If you are looking for more inspiration on how to serve chicken, this recipe is versatile enough to be the star of the plate or sliced up for meal prep lunches. Even if you aren’t an air fryer expert, you can achieve this result.
Common Cooking Mistakes to Avoid

The biggest mistake I see people make is not drying the chicken enough before seasoning. Water on the skin creates steam, which prevents the hot air from crisping the breading or skin. A thorough pat-down is essential. Another common error is overcrowding the basket. If you pile the chicken on top of itself, you will get uneven cooking and soggy spots.
Never skip the preheat. While some foods can go into a cold air fryer, chicken thighs benefit from the immediate high heat to start crisping the skin. Lastly, always check the internal temperature. While thighs are forgiving because of their higher fat content, undercooked poultry is dangerous. Relying on a thermometer ensures your chicken thighs are safe to eat and perfectly juicy.
Storage & Reheating Tips
Once the chicken has cooled completely, store it in an airtight container in the refrigerator for up to 4 days. I try to keep the skin exposed to air if possible to minimize sogginess, but a container works fine. Do not store the chicken while it is still warm, as the condensation will ruin the crispy texture you worked so hard to achieve.
When reheating, avoid the microwave if you want to keep the crispy skin. Instead, pop the thighs back into the air fryer at 350°F for 3 to 4 minutes. This will warm the meat through while restoring that crispy exterior. If you are meal prepping your air fryer spring chicken thighs, this reheating method makes them taste almost as good as they did on day one.
Conclusion
This recipe proves that you don’t need a long ingredient list or a lot of time to make a delicious, healthy dinner. The combination of bright lemon and earthy oregano highlights the natural sweetness of spring poultry, while the air fryer delivers a texture that is undeniably satisfying. It’s a reliable method that I return to again and again when I need something quick but impressive.
I encourage you to give this method a try the next time you’re staring down a package of chicken thighs and wondering what to make. It’s a fantastic entry point for anyone looking to expand their repertoire of easy dinner recipes. Once you master these simple, crispy chicken staples, you’ll find yourself reaching for the air fryer more often than the oven.
FAQs
How do I get the skin extra crispy?
The secret is high heat and making sure the skin is completely dry before it goes into the air fryer. Starting the cooking process skin-side down also helps render the fat faster. If you want even more crunch, you can add a light dusting of baking powder to the seasoning mix, which helps alter the pH of the skin for better browning.
Can I use frozen chicken thighs?
I strongly recommend thawing your chicken thighs completely before cooking. Placing frozen meat in the air fryer often leads to a burnt exterior and an undercooked interior because the timing is so hard to gauge. Thaw them overnight in the fridge or in a bowl of cold water for a quicker thaw before patting them dry.
What is the internal temperature for perfectly cooked thighs?
For dark meat like thighs, I recommend pulling them out when the internal temperature hits 165°F (74°C) in the thickest part. If you prefer meat that falls off the bone, you can go up to 175°F, but 165°F is the safe standard that keeps the meat juicy.
Can I use bone-in, skin-on thighs for this recipe?
Yes, and in fact, many people prefer them for the added flavor. The cook time will need to be extended slightly, usually by about 5 to 7 minutes. Always check the temperature with a meat thermometer to ensure they are cooked through, as bone-in cuts take longer to heat up.
How do I clean my air fryer after making this?
Let the basket cool down, then soak it in warm, soapy water. The rendered fat can harden, making it a bit sticky, but a good soak usually does the trick. Most air fryer baskets are dishwasher safe, but hand washing preserves the non-stick coating longer.
Crispy Air Fryer Spring Chicken Thighs (4-Ingredient)
Equipment
- Air Fryer
- Small Mixing Bowl
- Tongs
Ingredients
Main Ingredients
- 2 lbs boneless skinless chicken thighs cut into 1-inch chunks
- 2 tbsp olive oil or avocado oil
- 1 tbsp Italian seasoning or poultry seasoning blend
- 1 tsp garlic powder optional but recommended
- Salt and black pepper
Instructions
- Pat chicken thighs dry with paper towels and cut into uniform 1-inch chunks. This helps the skin get crispy.
- In a large bowl, toss chicken pieces with olive oil, Italian seasoning, garlic powder, salt, and pepper until evenly coated.
- Preheat air fryer to 400°F (200°C) for 3 minutes. This ensures that perfect crispy sear immediately.
- Arrange chicken in a single layer in the air fryer basket, leaving space between pieces. Do not overcrowd.
- Air fry for 10 minutes, shaking the basket halfway through cooking.
- Add remaining chicken and cook for another 8-10 minutes until golden brown and internal temp reaches 165°F.
- Let rest for 2-3 minutes before serving. This keeps the juices locked in.